Day
of Defeat Beta 3.1 Manual
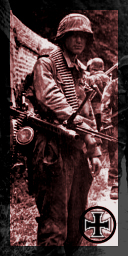
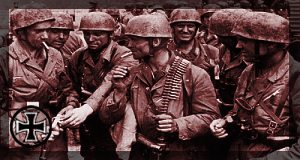
Welcome to the Day of Defeat Beta 3.1 manual. Day of
Defeat is a World War II multiplayer total conversion of Half-life.
DoD attempts to recreate WWII battles in both fictional
and non-fictional environments. DoD puts you in the shoes (rather, combat
boots!)
of either an Allied or Axis soldier circa 1944, Western
Europe.
Day of Defeat is a class based first person shooter - upon
arrival in game, you will have the choice to play different types of soldiers -
from
Rifleman to Machinegunners, to Snipers. Each class has its
own mix of special abilities and weapons.
The overall goal of the game depends upon the map; whether
it be to capture an area, defend a beach, or simply destroy the enemy.
The 10 maps included with Day of Defeat will give players
endless hours of replayability online. With a selection of nearly 25 weapons,
players will have something new to try every time they
play.
Best of all, Day of Defeat is a free download. Anyone with
a copy of either Half-Life or Counter-Strike Retail can play.
Day of Defeat is an ever-evolving game. We believe that
DoD Beta 3.1 is at an early stage in it’s life - there are many
more maps, weapons, and classes to come.
So for now, grab your helmet and rifle and prepare for the
most immersive World War 2 game to date!
Table
of Contents
1. Installing Day
of Defeat
2. Controls
3. The HUD
4. The VGUI
5. Machine Guns -
How to Use Them?
6. Gameplay Types
7. Scoring
8. Maps
9. Classes
10. Weapons
11. Clan Play
12. Setting up a Server
13. Server Commands
14. Client Console Commands
Installing
Day of Defeat
Installing DoD is a simple process. You must first have
Half-Life installed on your computer (Defaulted to C:\Sierra\Half-life). After
obtaining the full DoD installation file from an official mirror at
www.dayofdefeatmod.com, open the file and make sure you install it in your
Half-life folder (The install shouldn't ask you to create a folder unless you
have installed Half-life in a place other than the default)! After the install
has finished, there will be an icon on your desktop pointing to DoD.
Some people may ask "I don't have retail Half-Life,
but I have RETAIL Counter-Strike.
Will that work?" Yes it will. To install DoD with RETAIL Counter-Strike,
just install DoD to the CS path.
Example: For retail Half-Life the path to install would be
...\Sierra\Half-Life\. So for retail CS you would choose the path you installed
CS too. This will cause one of two things to happen. 1. DoD will replace CS as
the default game that starts when you start CS, or 2. you will need to goto the
'Console' after starting CS and type: game DoD. That will start DoD and you can
continue on. If you have a problem with this, you will find help in the DoD
support forums at www.dayofdefeatmod.com.
Controls
Once you’ve downloaded and installed Day of Defeat, you’ll
need to configure your controls before you play.
Simply select ‘Configuration’ from the main menu, then
‘Controls’ from the sub menu.
Most of the controls are fairly standard to First Person
Shooters, so those need no explanation. The following is a brief explanation of controls unique to Day of
Defeat:
Use Voice Communication - This feature will allow
you to communicate with others ingame using a microphone. Hold down this key and speak into the mic -
those close enough to you (On any team) will hear you. Voice communication will be setup during the
installation of the latest Half-life update.
Activate In-Game VGUI - This will bring up DoD’s
in-game menu, useful for many things including Voice commands and Hand Signals.
See the VGUI section for more information.
Voice Menu (1-3) - Brings up a quick selection of
voice commands. Each of the three menus require a seperate key. A voice command
will have your solider shout the command you have selected, as well as activate
the appropriate hand signal for that command.
Drop Ammo - A useful feature that lets you pass
ammunition to a teammate. Any class can
share ammo with any other class, except for Machine Gunners.
Drop Machine Gun Ammo - Light infantry each carry
one box of spare ammunition for Machine Gunners. Use this key to drop the ammo.
Machine Gunners carry a limited number of ammo boxes, so it is absolutely
necessary that teammates share their ammo.
Stop Yourself From Bleeding - Some wounds will
cause bleeding - designated by a pain sound and a blood icon on the left side
of the HUD. When bleeding, press this
key to bandage yourself. If you do not
bandage, you will slowly loose health until you die.
Prone - In addition to crouching, users can ‘prone’
- basically meaning they lay on the ground. Machine Gunners can deploy their bipod only when prone. (Or when in an
MG Nest area.) A user’s weapon will
become temporarily disabled while ‘going prone’ or standing back up.
Sprint - Holding down this key will give you a
burst of speed. As you sprint, your stamina will drain quickly, so sprinting is
only recommended in sticky situations.
Secondary Attack - Many weapons have a secondary attack
option. Secondary attack with the K98 rifle will stab with its bayonette, while
secondary attack with MG’s will deploy the bipod. (Only when prone, or in an MG
nest) Secondary attack using any sort of scoped weapon will activate it’s
scope.
Pick Up Grenades (Use Item) - If a grenade lands at
your feet, you may pick it up and throw it back by using this key. Watch out, though - grenades have a fuse of
5 seconds, and will go off in your hand if you aren’t careful.
The
HUD (Heads Up Display)
Day of Defeat has a graphical HUD that displays useful
information such as Objective Status, ammunition, reinforcement times,
etc. The following provides a brief
explanation for each part of the HUD:
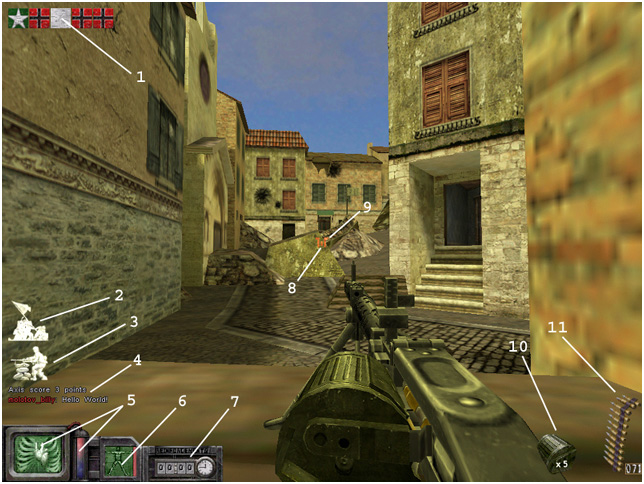
1) Objective Status - Lets you know who is in possession
of what flags, including ‘neutral’ flags. Area capture flags will slowly change colors as they are being captured.
2) Area Capture Indicator - Let’s you know that you are in
an ‘Area Capture Zone.’ Standing in a
capture zone will slowly change the flag of that zone to your side. Some area captures require more than one
person to capture. In addition to this
icon, a ‘Plant the TNT’ icon will come up when you have TNT and are near a
destroyable object.
3) Machine Gun Nest Indicator - Let’s you know that you
are in an area that allows you to deploy your bipod while standing. This will work only for the Machine Gunner
classes. (As well as the FG42 German Paratroop rifle) These nests area usually
found near bunkers, sandbag walls, and window sills.
4) Message Area: This area is reserved for map messages
and chat messages.
5) Stamina Indicators - A graphic display of how much
stamina your player currently has. Stop moving to regain stamina. Crouching and
proning will allow you to regain stamina faster.
6) Health Indicator - A graphic display of a player’s
current health. Health cannot be
recharged like stamina can.
7) Reinforcement Timer - This lets you know when the next
‘reinforcement wave’ will be spawning.
8) Crosshair, center - The center part of your crosshair
is an indicator of how accurate your fire will be. This part will roam around the screen as you move, indicating
innaccuracy. (Stand still, crouch, or go prone to gain accuracy.)
9) Crosshair - This part of the crosshair does not move,
and is a general indication of where you are aiming/pointing to.
10) Clips - A graphic representation of the number of
clips left in
your inventory, not including the clip
that is
currently loaded.
11) Ammunition - Number of rounds left in your current
clip.
The
VGUI
The VGUI is a useful menu system in DoD that allows you to
do a number of things while playing the game. The following is a short
description of each VGUI item.
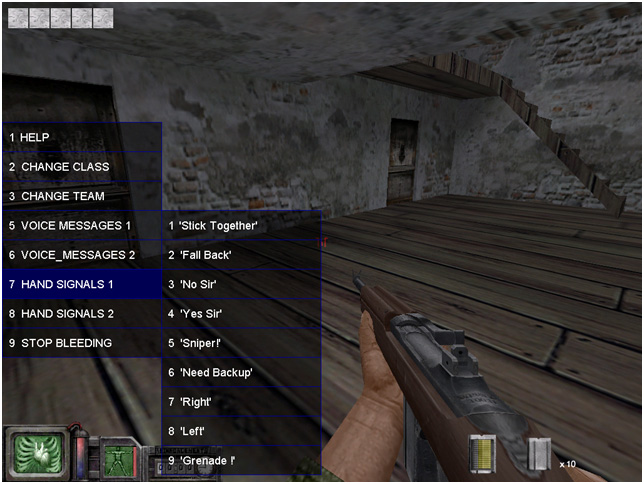
1. Help - Gives you specific information about your
current server, map, and class.
2. Change Class - Allows you to change your current
player class.
You will use the new class on your next
respawn. (Death)
3. Change Team - Allows you to change your current
team.
Changing teams
results in an instant respawn.
5-6. Voice Messages - Lets you select from a series
of
voice commands
to use. Some of these will also
result in your
player using hand signals.
7-8. Hand Signals - These accomplish the same thing as
the Voice
Commands, but without the shouting. A
useful tactic
when stealth is required.
9. Stop Bleeding - Bandages your wounds if you are slowly
losing life from
bleeding.
Machine
Guns - How to Use Them?
At first glance, the use of Machine Guns may seem a bit
tricky. The following is a quick run
through of how to use Machine Guns effectively.
All three Machine Guns are horribly inaccurate unless they
are deployed. To deploy a machinegun:
Go prone with the ‘prone’ key.
Deploy your bipod with the ‘secondary fire’ key.
A short animation will play, and you will be ready to
rock. While deployed, a player cannot
move, and has only a limited view. Undeploy your bipod using the ‘secondary fire’ key in order to move
again.
Machine Guns can only be reloaded if the bipod is
deployed.
In addition to proning, Machine Guns can be used while
standing in certain areas of most maps. These areas are called ‘MG Nests’, and a small graphic will pop up in
your HUD to indicate you are in a nest. See the HUD section to view the MG Nest
graphic. Once in an MG nest, a player
can deploy his bipod while standing.
You will find that Machine Guns run out of ammo very
quickly. Since the Machine Gunners have
no secondary weapons, this can be a major problem. To alleviate this, you will need to ask your teamates to pass
ammunition. Light Infantry carry one
box of MG ammo, in addition to their own rifle ammo. They can drop
this ammo to you by
pressing the ‘Drop MG Ammo’ key.
Another weapon similar to a Machine Gun is the FG42
paratroop rifle. Although it isnt an MG
in the true sense, it does have a bipod, granting the user the ability to
deploy it in a similar manner to MG’s. Like the MG’s, the FG42’s bipod can be deployed on ‘MG nest’ locations,
as well as when prone. Unlike the MG’s,
however, the FG42 does not need to be deployed in order to reload the magazine.
Day
of Defeat Gameplay Types
There are two major types of ‘gameplay’ in Day of Defeat.
(Gameplay meaning the general setup, or rules, of the game.)
Standard maps (Any map released up to version 2.1) run on
DoD’s signature ‘Wave Reinforcement’ system. After joining a game, choosing a side and player class, the player will
‘spawn’, ready for combat. The
objectives usually involve the capturing of flags spread throughout the
map. These maps represent territorial
control – who maintains hold of what ground on the map. Most flags are captured by simply running
underneath them. Some flags are ‘Area
Capture’ – meaning that they can be captured simply by standing in a zone around
the flag. Certain Area Capture zones will require more than one team member to
capture. Once enough players are
present in a flag zone, that flag will slowly change to their control.
With ‘Wave Reinforcement’ gameplay, upon a death, the
player will be placed in a ‘Reinforcement’ pool. This pool of (dead) players will have to wait a specific amount
of time – between 5 and 20 seconds depending on how even the teams are – before
they ‘respawn (Play again).’ This
system allows players to continue playing without any downtime. Players will also tend to spawn with other
groups of players – encouraging teamwork.
A second type of gameplay, introduced in version 3.0,
involves the use of Paratroopers. In
these maps, flags are not captured – rather, Paratroopers must perform a
specific task in order to ‘win’ the map. This task can be anything from destroying an 88mm flak cannon, to
capturing a fuel truck. An entire team will spawn in a specific area, and they
will be given instructions on what their task is. The defending force is also spawned, and given orders on what to
defend. Once a player dies, he does NOT
respawn until his entire team, or the entire enemy team, is destroyed. Also, if the objectives are carried out
before a team is defeated, that ‘round’ will end, and that team will win.
If the time limit expires (A few minutes,
depending on the mission), the defending team will win. After a team wins, the round will restart,
and both teams will respawn in their entirety.
Scoring
Scoring in DoD maps varies greatly. Most maps give you
points, along with your team for frags (kills) and accomplishing objectives.
But some maps won't give you team points for frags, only objectives. So make
sure you know the scoring system of the map before you go on a killing spree
for team points.
Flags usually give between 1-10 team/personal points.
Objectives are usually much higher in team points, but lower in personal
points, if any. Frags are usually 1-2 team points per kill. On attack/defend
maps, the defenders get team points by frags/holding their position for certain
amounts of time.
Day
of Defeat Maps
Paratrooper
Maps
Kraftstoff

Gametype: Paratrooper Rounds
German scouts have discovered that Allied forces are using
the town of Kraftstoff as a major
staging point to transport fuel and supplys into germany
for the allied war effort. German
forces quickly begin plans to capture or sabotage the fuel
trucks in an attempt to slow the
Allied advance.
Allies: Defend the the fuel trucks at all cost to prevent
the Axis from advancing.
Axis: Capture one of the two fuel trucks to get fuel for
your ‘King Tiger’ tank.
Hedgerow
Gametype: Paratrooper Rounds
Allied Objective: Parachute into hedgerow country and use
TNT blocks to destroy the two 88 gun emplacements.
No reinforcements are available!
Axis Objective: Prevent Allied Paratroops from destroying
the 88s.
No reinforcements are available!
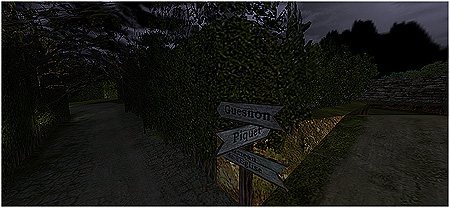
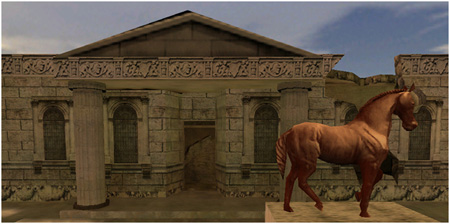
Glider

Gametype: Paratrooper Rounds
Destroy the Cannons! OR Destroy the Radio Room!
Allies must either destroy the two 88mm flak cannons in
the field
next to the château OR destroy the Axis radio room located
in the
castle to win. Axis must defend these targets at all
costs.
Either target can be destroyed by placing explosive
charges
near the targets themselves. Allies must first use TNT to
blow
holes in the castle wall to get to the radio room. You
must wait
for the timer when placing explosives.
Allies only have to destroy one of the two targets in 4
minutes
or less to win. The Axis team wins by defending for 4
minutes or by destroying
the Allied assault party. The Axis team can destroy the
bridge over the lake
to hinder allied advance.
Standard
Maps
Overlord
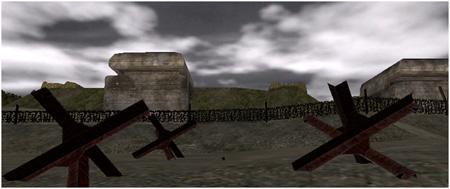
“Soldiers, Sailors and Airmen of the Allied Expeditionary
Force! You are about to embark upon the Great Crusade, toward which
we have striven these many months. The eyes of the world
are upon you. Your task will not be easy, as your enemy is well trained,
equipped and battle-hardened. But this is the year 1944!
Our air offensive has seriously reduced their strength in the air and their
capacity to wage war on the ground. The tide has turned!
We will accept nothing less than full Victory!”
-Dwight Eisenhower
Allied Objectives: Destroy the barbed wire with bangalores.
Once on the bluff, use teamwork to capture the three Axis machinegun
nests.
Fight inland to capture the remaining Axis
strongholds. As a secondary objective,
once the Axis MG nests are captured, use the TNT
found in the bunkers to destroy the 88mm FLAK guns near
the rear of the map.
Axis Objectives: Hold the beach! Holding back the allied forces for at least 30 minutes will
result in victory.
Allied Tips: Don’t linger on the beach. Run from one area
of cover to another, using the “sprint” command while you still have
stamina.
Axis Tips: There are dozens and dozens of great ambush
spots. Well placed MG’s can hold off
entire squads.
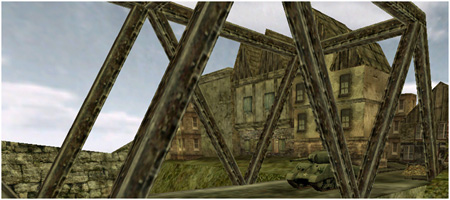
Avalanche
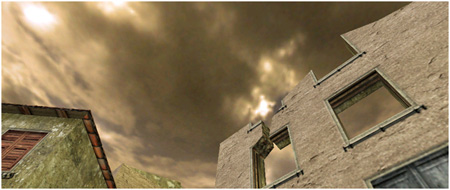
Near Salerno, Italy 1943.
A couple of days after establishing a beachhead at
Salerno, the American advance towards the hills
was stopped by a vicious German counterattack on September
13. Intense street fighting ensued,
with some towns changing hands several times a day.
Objectives: Control the 5 flags to win. Some are “team” flags, so will require more
than one person to capture.
Tips: The half-destroyed buildings through town are filled
with great ambush spots. Be wary of
dark windows – they’re perfect hiding places for snipers.
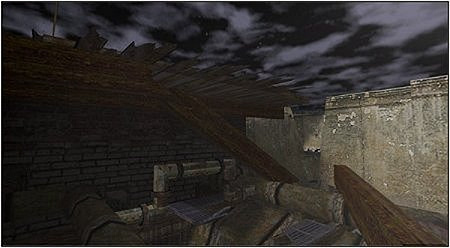
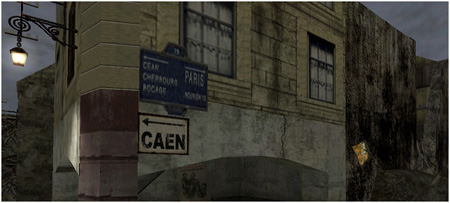
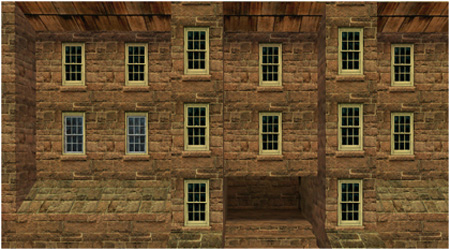
Caen 2
The city of Caen is in ruin. Fierce battles are raging through the narrow, debris littered
streets. Move your way carefully
through bombed-out buildings and past long-destroyed tank hulks. Stay alive and capture what you can.
Objectives: Capture the flags. Also, TNT has
been placed near each end of the map – use the TNT to blast your way through
certain buildings to avoid exposure on the streets.
Tips: Stay clear of the streets if at all possible,
especially the main plaza. There are
many less watched side streets you can travel to avoid the enemy.
Koln
Armies advance on the city of Koln (Cologne) as it lies in
ruins from incessant Allied bombing. The Axis desparately attempt to hold the entire city, but in one
industrial sector, they try to delay the Allied advance as much as they can.
Allied Objectives: Starting at the northern factory region, advance and take the two
factory area flags, the rail yard flag, and lastly the two flags in the
southern street region. Watch out for
snipers and MG emplacements in the rubble.
Axis Objectives: Starting at the southern street region, take the street control flags,
move on to the rail yard, and lastly take the two factory area flags. The factory may be difficult to take, but
there are multiple routes into the area. Use caution!
Tips: Many routes
in this map enable rear guard actions, suprise attacks, and unexpected
advances. Use rubble and cover as best
you can. Some areas are unstable so
watch your footing!
Cherbourg
The allies have landed in Normandy. The Battle for Cherbourg
will take guts and precision.
Allied Objectives: Capture all flags, defend your town.
Axis Objectives: You must maintain control of Cherbourg -
capture all of the flags.
Tips: Be careful in the underground tunnel area - it’s a
magnet for grenades. There are several
alternate routes that will
reach the objectives just as quickly.
Anzio
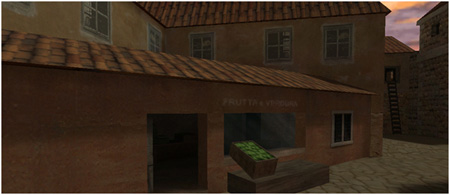
January 21 1943. All is ready for the incoming
night-landing in Anzio.
Allied Objectives: Gain the control of the south side of
the city of Anzio. Make your way through the town, take control of the 5
crucial sites of the city; this will open the way to Nettuno and will help the
incoming landing.
Axis Objectives: Take control and defend the town at any
cost.
Tips: The empty store front near the center of the map is
a great ‘overwatch’ position of the crossroads.
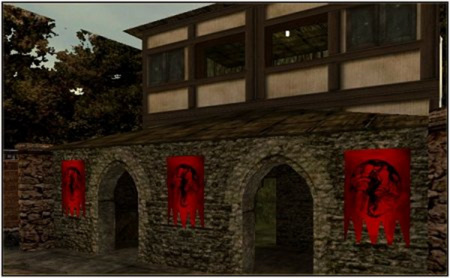
Zafod
Axis Objectives: It is down to the final moments. Our city
of Zafod is the last defense for the fatherland. The only way through the city is the bridge in the middle of
town, defend it and drive the enemy from our sacred land.
Allied Objectives: The city of Zafod is a key strategic
point to launch operations further into the heart of Germany. The city has resisted for weeks becuase the
Germans cannot be driven out of the cramped city streets. Secure the town and wait for
reinforcements.
Tips: Securing the bridge in the middle of the town will
let your team spawn closer to the front lines. Try not to linger near the bridge unless capturing the flag – it’s a magnet
for enemy MG fire and grenades.
Thunder
July 18th, 1944. The allies reach the town of Saint-Lô
after the British and Canadian assualt on and siege of Caen. The 1st American
army with 35th and 29th infantry divisions begins the assualt, while Saint-Lô
is supported by the German 84th infantry division and the 2nd Fallshirmjäger
division. The Americans must sieze control of the town to prevent the approach
of the German 7th army from the southwest and support a German perimeter
defense line which could delay the American and British campaign.
Objectives: Capture the flags.
Tips: The rain and thunder in this map will mute all but
the loudest sounds. You usually won’t
hear the enemy moving until you’re right on top of eachother – so stay alert!
Ramelle
Ramelle contains one of the last remaining intact bridges
in this area. Whoever holds the bridge
holds the fate of the battle in their hands.
Objectives: Capture the flags.
Tips: The buildings next to the bridge are great for
‘overwatch’ positions. Place an MG or Sniper in these buildings to cover any
troops crossing the bridge and capturing the area flag.
Heutau
As the Invasion neared its end, there was only one last
barrier left to prevent the Allied Forces from entering the southern regions of
the Reich: the Chiemgau Region with the key city Heutau, the Wehrmacht´s last
real stronghold.
Allied Objectives: You all know what is in front of you,
the Germans are fighting like a cornered rat inflicting heavy casualties every
footstep we try to proceed, Heutau is the key to this region and this region is
the key to the Reich.
Axis Objectives: We now have the chance to beat our enemy
and gain back the initiative we lost since Sicily, I don´t have to tell you
what would happen if we loose Heutau so don´t even think about retreating.
There is nothing else other than total victory left for us. We are expecting a
massive assault in the late afternoon so get in position.
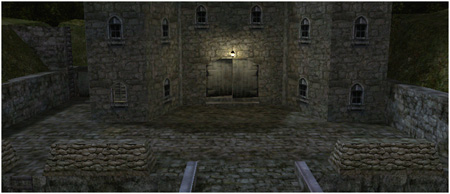
Schwetzingen
Allied Objectives: Gain control of the flags to win.
Axis Objectives: Axis receive points based on how long
they hold out, and which flags they maintain.
Tips: The tower gives a great view of the town and bridge
– but be careful, it can be easily fired upon at nearly any spot in town.
Day
of Defeat Player Classes
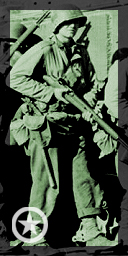
Allied
Classes
Rifleman
Primary Weapon: Garand Rifle
Primary Ammo Loadout: 11 clips, 8 rounds each
Secondary Weapons: Colt Pistol, Knife
Grenades: 2
The Rifleman – aka “Light Infantry” is a good all around
class – deadly at both long and short range. Not as effective on the move or in
assaults, however.
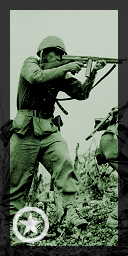
Sergeant
Primary Weapon: M1 Thompson, or M1 Carbine
Primary Ammo Loadout (Thomspon): 7 clips, 30 rounds each
Primary Ammo Loadout (Carbine): 11 clips, 15 rounds each
Secondary Weapons: Colt Pistol, Knife
Grenades: 1
The Sargeant is a class designed for assaults, as well as
close-in engagements. With the
Thompson, he can “spray and pray”, while with the Carbine he needs to pick his
shots more carefully.
Support Infantry
Primary Weapon: Browning Automatic Rifle (BAR)
Primary Ammo Loadout: 12 clips, 20 rounds each
Secondary Weapons: Colt Pistol, Knife
Grenades: 1
The Support Infantry is a hybrid of the Rifleman and
Sargeant classes. His BAR packs enough firepower and accuracy to be deadly at
almost any range, although his clip capacity and slower speed limit him on
assaults.
Sniper
Primary Weapon: Springfield Sniper Rifle
Primary Ammo Loadout: 11 clips, 5 rounds each
Secondary Weapons: Colt Pistol, Knife
Grenades: None
The Sniper is a tricky class to play. Although he requires team support on the
move, once he’s found a good position, he can hold his own against entire
squads of enemies.
Machine Gunner
Primary Weapon: .30
Caliber Machine Gun
Primary Ammo Loadout:
2 boxes, 150 rounds each
Secondary Weapons:
None
Grenades: None
Like the Sniper, the
Machine Gunner requires the support of teammates to be effective. On the move, his undeployed weapon is
virtually useless, and with no secondary weapons, he is very vulnerable. Once in position, a good Machine Gunner can
decimate anything unfortunate enough to be in it’s path. Once a Machine Gunner runs low on ammo,
however, he will need a teammate to pass ammo boxes – since once again he has
no secondary weapon.
Allied Paratroops (Airborne)
Airborne troops will only appear on “Para” maps. Paratroopers can select from any normal
weapon, as well as paratrooper-specific weapons. (The Greasegun and folding
stock Carbine) Like normal classes,
they carry a number of grenades depending upon the primary weapon that they
choose.
Axis
Classes
Grenadier
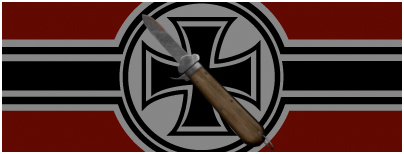
Primary Weapon: Karbiner 98k Rifle with Bayonette
Primary Ammo Loadout: 13 clips, 5 rounds each
Secondary Weapons: Luger Pistol, Spade
Grenades: 3
Like the Allied Rifleman, the Grenadier is a very
versatile class. In addition to his
accurate, powerful rifle and attached bayonette, he also has four grenades with
which to cause havoc.
Unteroffizier
Primary Weapon: MP40 Machine Pistol
Primary Ammo Loadout: 7 clips, 31 rounds each
Secondary Weapons: Luger Pistol, Spade
Grenades: 1
Like the Allied Sargeant, the Unteroffizier is a class
designed for assaults, as well as close-in engagements.
This class is very similar to the Scharführer class,
although the MP40 trades damage for reduced recoil.
Scharführer
Primary Weapon: MP44 Assault Rifle
Primary Ammo Loadout: 7 clips, 30 rounds each
Secondary Weapons: Luger Pistol, Spade
Grenades: 1
The Scharführer has no real allied counterpart. His primary weapon, the MP44 – was the first
true “Assault Rifle” – the only one in WW2. It struck a great balance between stopping power, range, clip capacity,
and recoil that was unmatched by most weapons.
Scharfschuetze
Primary Weapon: Karbiner 98k Sniper Rifle
Primary Ammo Loadout: 13 clips, 5 rounds each
Secondary Weapons: Luger Pistol, SS Knife
Grenades: None
The Scharfschuetze is a tricky class to play. Although he requires team support on the
move, once he’s found a good position, he can hold his own against entire
squads of enemies.
MG-Schütze
Primary Weapons: MG42 Machine Gun, or MG34 Machine Gun
Primary Ammo Loadout (MG42): 2 boxes, 250 rounds each
Primary Ammo Loadout (MG34): 5 cans, 75 rounds each
Secondary Weapons: None
Grenades: None
The Machine Gunner was the backbone of German Military
doctrine, and in turn the MG-Schütze is very important to any squad. Like it’s allied counterpart, the MG-Schütze
requires support on the move, and extra ammunition once it’s deployed. Allthough the MG42 provides more raw firepower,
the MG34 trades clip capacity and rate of fire for accuracy and lighter recoil.
Axis Paratroops (Fallschirmjager)
Fallschirmjager troops will only appear on “Para”
maps. Paratroopers can select from any
normal weapon, as well as paratrooper-specific weapons. (The FG42 and K43)
Like normal classes, they carry a number of
grenades depending upon the primary weapon that they choose.
Day of Defeat Weapons
Allied Weapons
Garand Rifle
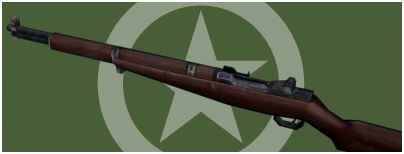
Operation: Semiautomatic
Caliber: .30-06 Rifle
Capacity: 8 round clip
Weight: 9.5 lbs
Damage: Heavy
Accuracy: Good
Recoil: Heavy
The first self-loading (semiauto) rifle to enter a
nation’s service as the stanard issue rifle was the M1 Garand. Production began in 1936, and the Garand
proved to be reliable, tough, and effective. While German infantry doctrine revolved around the machinegun, American
doctrine counted on the rifle.
Game Tips: The distinctive ‘ping’ sound of a Garand clip
being ejected can be heard by nearby players – a dead giveaway to the enemy that
you’re out of ammo.
Thompson Submachine Gun
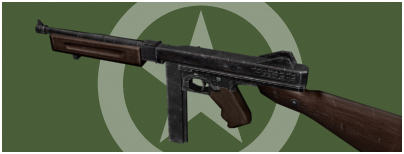
Operation: Automatic
Caliber: .45 ACP
Capacity: 30 round box magazine
Weight: 11 lbs
Damage: Moderate
Accuracy: Medium
Recoil: Moderate
The Thompson Submachine Gun, also known as the “Tommygun”,
was made in a wide variety of forms – sold in both the civilian and military
market.
When the US Army was rearmed in the late 1930’s, the
Thompson was eventually accepted, entering service in 1938.
Several changes were made to the weapon to alleviate the
cost of manufacturing, and the Thompson M1 was born.
Game Tips: The Tommygun can be devestating at short range
– aim low and fire in long bursts – the recoil will drag your fire upwards
across your target.
Browning Automatic Rifle (BAR)
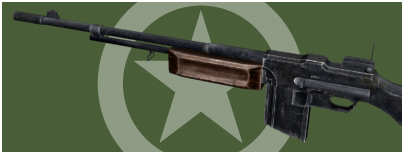
Operation: Automatic
Caliber: .30-06 Rifle
Capacity: 20 round box magazine
Weight: 18.5 lbs
Damage: Heavy
Accuracy: Good
Recoil: Heavy
Designed by John Browning during World War I, the Browning
Automatic Rifle saw limited service in that conflict. It’s major use came during World War II when American squads
needed heavy, automatic fire on the move. Not quite a rifle, and not quite a light machinegun, the BAR served as
an interesting, effective hybrid of the two.
Game Tips: The BAR’s heavy recoil and low magazine capacity
will make long range automatic fire useless. Fire in 2-3 shot bursts for the best effectiveness.
M1 Carbine
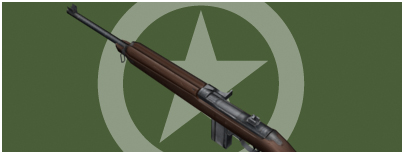
Operation: Semiautomatic
Caliber: .30 Carbine
Capacity: 15 round box magazine
Weight: 5 lbs
Damage: Light
Accuracy: Good
Recoil: Light
The most widespread American weapon of World War II was
not a rifle, handgun, or even a submachinegun; rather, it was a combination of
all three: the M1 Carbine. In 1938, the army requested a light weapon for use
by officers, NCO’s, drivers, machinegunners, signallers and others who would
find a rifle an akward hindrance. By
1941, the M1 Carbine entered service, and by war’s end, nearly 6 million were
produced.
Game Tips: The .30 Carbine round is not the same round
used in other .30 caliber weapons – it is shorter, and much weaker. Most enemies will require several hits to be
taken out.
M1 Folding Stock Carbine
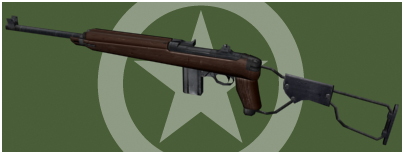
Operation: Semiautomatic
Caliber: .30 Carbine
Capacity: 15 round box magazine
Weight: 5 lbs
Damage: Light
Accuracy: Good
Recoil: Light
The M1 folding stock Carbine is essentially the same
weapon as the M1 Carbine. It was fitted
with a folding stock and crude pistol grip, making it very useful for Airborne
troops who had trouble carrying larger weapons.
Game Tips: The .30 Carbine round is not the same round
used in other .30 caliber weapons – it is shorter, and much weaker. Most enemies will require several hits to be
taken out.
Springfield ’03 Sniper Rifle
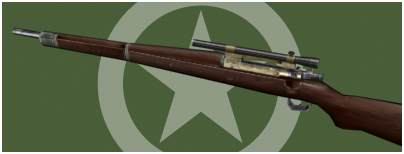
Operation: Bolt-action
Caliber: .30-06 Rifle
Capacity: 5 round stripper clip
Weight: 9.38 lbs
Damage: Heavy
Accuracy: Very Good
Recoil: Heavy
The Springfield rifle was the standard issue rifle of
American forces all throughout World War I and up until 1938.
During World War II, however, leftover springfields were
delegated to other roles, including a sniper rifle.
Game Tips: Crouching and laying on the ground will help
eliminate the “sway” encountered while zoomed in. Standing and firing is very difficult with this weapon.
.30 Caliber Air-Cooled Machinegun
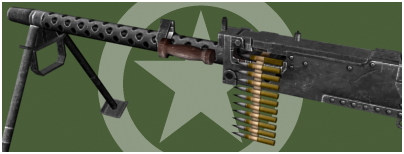
Operation: Belt-fed, automatic
Caliber: .30-06 Rifle
Capacity: 150 round belt
Weight: 32.5 lbs (with bipod)
Damage: Heavy
Deployed Accuracy: Good
Undeployed Accuracy: Poor
Deployed Recoil: Light
Undeployed Recoil: Heavy
Another weapon developed by John Browning, also known
simply as the ’30 cal’, saw widespread use throughout World War II as both a
vehicle mount and infantry weapon.
Surprisignly light for the capabilities bestowed, the 30
cal is a tough and reliable weapon, and thousands are still in service around
the world today.
Game Tips: The 30 cal has a reasonable rate of fire and a
large supply of ammo – making sustained suppressive fire very useful with this
weapon.
MG Useage: Machineguns are nearly useless when not
deployed. Go ‘prone’ and hit ‘secondary
fire’ to deploy your bipod. (Or, find an ‘MG nest’ to deploy the bipod while
standing.)
M3A1 'Greasegun'
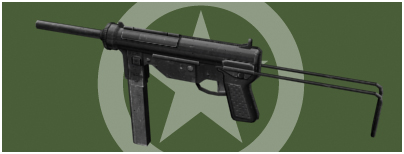
Operation: Automatic
Caliber: .45 ACP
Capacity: 30 round box magazine
Weight: 9.9 lbs
Damage: Moderate
Accuracy: Medium
Recoil: Moderate
Early in the war, it became clear that the Thompson
Submachinegun, although an effective and reliable weapon, was far too expensive
to mass produce at an adequate scale. The United States Ordnance Department began a search for a weapon made
completely of non-expensive metal, mostly from stamped parts. The new submachinegun was formally adopted
on December 24, 1942, as the ‘Submachine Gun, Caliber .45, M3.’ After several revisions, the M3A1 was
born.
The M3A1’s crude look gave it the nickname
‘Greasegun.’ Its small size lent itself
very well to tank crews, as well as paratroopers. It was used extensively from 1944 on until the Vietnam War, where
it still saw use with Special Forces units.
Game Tips: The M3A1 Greasegun is nearly identical to the
Thompson, the main difference being the Greasegun’s slower rate of fire.
Although it doesn’t spray as much lead as
the Thompson does, it’s slower rate of fire allows a player to conserve
ammunition. The Greasegun is very
useful in the prone firing position – it’s accuracy will allow an easy
headshot.
Colt 1911 Pistol
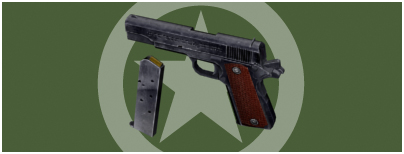
Operation: Semiautomatic
Caliber: .45 ACP
Capacity: 7 round box magainze
Weight: 2.43 lbs
Damage: Moderate
Accuracy: Poor
Recoil: Moderate
In 1907, a series of trials was carried out to find a handgun
to replace the existing .38 caliber service revolvers. The eventual winner of the 1907 trials was a
square, solid-looking automatic developed by John Browning. Four years later this handgun entered
service as the Colt M1911, and it was to become one of the most successful and
popular military pistols of modern times.
Game Tips: Single shots with a pistol are
uneffective. Firing in quick succession
is your only reasonable chance of overcoming an opponent with his primary
weapon.
US Issue Knife
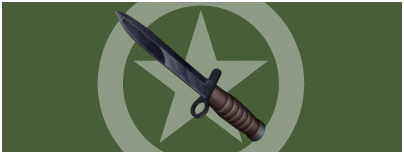
Damage: Moderate
Standard issue knife to all US WWII servicemen, used as a
utility knife for all situations, and as a ‘last resort’ self defense weapon.
Game Tips: A knife will usually only kill in one hit if it
is to the head – so aim high.
Fragmentation Grenade

Damage: Heavy
US Army standard “pineapple” fragmentation grenade. Issued
in varying numbers to combat troops for assault, defense, and special purpose.
Game Tips: Enemy grenades can be caught and thrown
back. When you see an enemy grenade on
the ground (or in the air, if you’re really good!),
hit the ‘use’ key to catch it and the ‘fire’ key to throw
it back. Be quick, though – grenades
only have a 5 second fuse.
Axis Weapons
Mauser Karbiner 98k
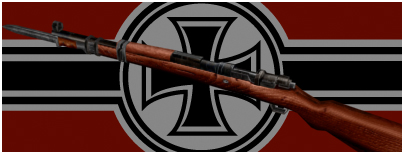
Operation:
Bolt-action
Caliber: 8mm Mauser
Capacity: 5 round
stripper clip
Weight: 8.5 lbs
Rifle Damage: Heavy
Bayonette Damage:
Moderate
Accuracy: Great
Recoil: Heavy
The Karbiner series
of rifles were issued to most German infantrymen throughout World War I and II.
It proved reliable through both wars:
delivering heavy
rounds at long ranges, with great accuracy. An attachable bayonet was also included as standard issue.
Game Tips: In
addition to the K98’s great accuracy at long ranges, the bayonette can be a
very effective weapon in close quarters – hit the ‘secondary fire’ key to use
it.
Karbiner 43
Operation: Semiautomatic
Caliber: 8mm Mauser
Capacity: 10 round box magazine
Weight: 8.6 lbs
Rifle Damage: Heavy
Accuracy: Good
Recoil: Heavy
Throughout 1941-1942, the German Army’s standard issue
rifle, the K98k, simply could not compete with Soviet semi-auto rifles in sheer
volume of fire.
To answer that discrepancy, Germany engineered a semi auto
rifle of its own. Although it was never
produced in the numbers suitable to equip all
frontline troops, the K43 (Also known as the ‘G43’) proved
to be an effective weapon, especially in the sniper role.
Game Tips: The K43 is very similar to the Garand in
performance – great for medium/long ranges, not quite as effective close-in.
MP40 Machine Pistol
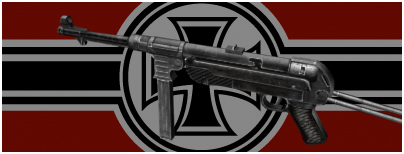
Operation: Automatic
Caliber: 9mm Parabellum
Capacity: 31 round box magazine
Weight: 8.7 lbs
Damage: Moderate
Accuracy: Medium
Recoil: Moderate
Since the early 30’s, work had been underway to form a
true submachinegun – looking forward to the new ‘Lightning War’ doctrine of
high mobility and maximum local superiority. Introduced in 1938, at a time when all the world’s submachineguns were
unnecessarily heavy and expensive – the new MP38 Maschinenpistole (and
subsequent MP40) revolutionized conventional ideas of what a sub-machine gun
should be.
Game Tips: Like the Tommygun, the MP40 is one of the few
guns that can be used effectively on the run – although accuracy is poor while
moving, the MP40’s volume of fire will usually keep it effective.
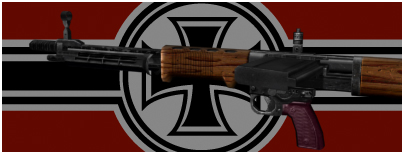
MP44 Assault Rifle
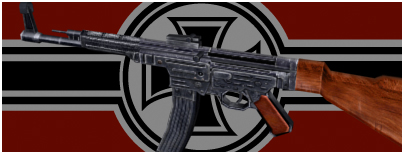
Operation: Automatic
Caliber: 8mm Kurz
Capacity: 30 round ‘bananna clip’
Weight: 11.5 lbs
Damage: Moderate
Accuracy: Medium
Recoil: Moderate
The MP44 assault rifle was easily one of the biggest
achievements in history for the modern infantryman.
The first ever of its kind in that it used a shortened
rifle cartridge – more powerful than standard pistol ammo,
but not so powerful as to become uncontrollable in
sustained fire. The MP44, if production
had continued,
would have replaced every rifle and submachinegun in the
German Army.
Game Tips: The MP44 is a good weapon all-around. It’s accuracy is slightly better than the
SMG’s, so can be used at both long and short range.
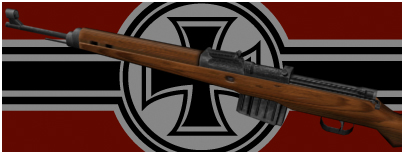
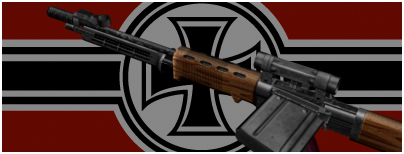
FG42 Paratroop Rifle
Operation: Automatic
Caliber: 8mm Mauser
Capacity: 20 round
box magazine
Weight: 9.9 lbs
Damage: Heavy
Accuracy: Medium
Recoil: Extremely
Heavy
The FG42 was designed
specifically for paratroops. It’s light
weight and small size was perfect for airborne operations –
yet, at the same
time, its 20 rounds of 8mm Mauser would provide the firepower of a light
machinegun in each rifle.
The desired outcome
wasn’t exactly reached, however, as the weapon’s light weight and short length
was ill-suited for a
full size rifle
cartridge. The recoil was enormous,
making sustained automatic fire impossible. The complexity of the design
slowed production to
a crawl – only 7000 of these weapons were ever made.
Game Tips: The FG42
is fairly useless at long range unless your bipod is deployed. Otherwise, the weapon is great for close-in
work.
FG42 Paratroop Rifle - Scoped
Operation: Automatic
Caliber: 8mm Mauser
Capacity: 20 round box magazine
Weight: 9.9 lbs
Damage: Heavy
Accuracy: Medium
Recoil: Extremely Heavy
This weapon is identical to the previous FG42 except that
it sports a scope rather than a bipod.
Game Tips: The FG42’s scope does not grant a huge bonus in
accuracy like other sniper rifles – however, it does allow you to see the
target area much more clearly.
Mauser Karbiner 98k Sniper Rifle
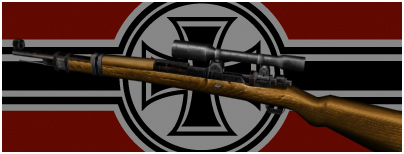
Operation: Bolt-action
Caliber: 8mm Mauser
Capacity: 5 round stripper clip
Weight: 11 lbs
Damage: Heavy
Accuracy: Great
Recoil: Heavy
The standard german infantryman’s weapon was easily
adapted as a sniper rifle with a simple “High Turret” scope attachment.
This versatility was one of the reason’s the K98’s service
life was so long.
Game Tips: Crouching and laying on the ground will help
eliminate the ‘sway’ encountered while zoomed in. Standing and firing is very difficult with this weapon.
MG34 Machine Gun
Operation: Belt-fed, automatic
Caliber: 8mm Mauser
Capacity: 75 round ‘assault’ drum
Weight: 26.6 lbs
Damage: Heavy
Deployed Accuracy: Good
Undeployed Accuracy: Poor
Deployed Recoil: Light
Undeployed Recoil: Heavy
The MG34 was a truly revolutionary development – it gave
the German infantryman the world’s first machine gun that was fully capable of
providing a high volume of sustained firepower without sacrificing speed of
movement and tactical flexibility. Today
every military power in the world employs machine guns that have evolved from
the basic configuration and principles of the MG34.
Game Tips: The MG34 has the best accuracy of all the MG’s
– it will retain some effectiveness undeployed and on the move, although a
deployed position is still recommended.
MG Useage: Machineguns are nearly useless when not
deployed. Go ‘prone’ and hit ‘secondary
fire’ to deploy your bipod. (Or, find an ‘MG nest’ to deploy the bipod while
standing.)
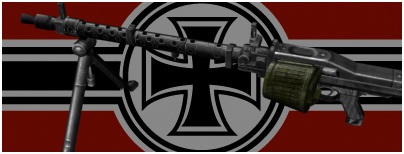
MG42 Machine Gun
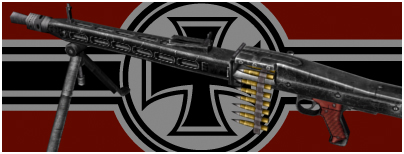
Operation: Belt-fed, automatic
Caliber: 8mm Mauser
Capacity: 250 round belt
Weight: 25.3 lbs
Damage: Heavy
Deployed Accuracy: Good
Undeployed Accuracy: Very poor
Deployed Recoil: Light
Undeployed Recoil: Extreme
Hurried into development to overcome problems with the
MG34, the radical new MG42 established a reputation for reliability and combat
effectiveness despite its crude appearance. It’s revolutionary yet simple design soldiers on even today with the
German Bundeswehr and other European armies, in a form virtually identical to
the very first production models.
Game Tips: The MG42 has the highest rate of fire of any
weapon in the game – over 1200 rounds per minute! Because of this, it will chew
through ammo fairly quickly – it can even overheat it’s barrel if you don’t
control your fire.
MG Useage: Machineguns are nearly useless when not
deployed. Go ‘prone’ and hit ‘secondary
fire’ to deploy your bipod. (Or, find an ‘MG nest’ to deploy the bipod while
standing.)
P08 Luger Pistol
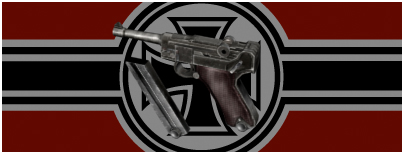
Operation: Semiautomatic
Caliber: 9mm Parabellum
Capacity: 8 round box magazine
Weight: 1.93 lbs
Damage: Moderate
Accuracy: Poor
Recoil: Light
The Luger Pistol is easily one of the most infamous
pistols on earth. The 9mm parabellum
cartridge first came about in 1902 and was adopted by the German Navy in
1904. By 1908, it was the standard
German service pistol of all military branches.
Game Tips: Single shots with a pistol are
uneffective. Firing in quick succession
is your only reasonable chance of overcoming an opponent with his primary
weapon.
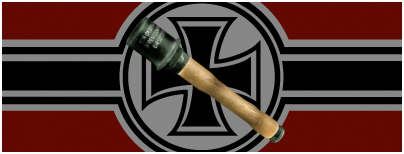
“Spade” Entrenchment Tool
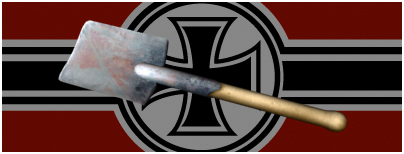
Damage: Heavy
Most soldiers in any army were issued “entrenching tools”
– compact, light shovels that aided in the construction of foxholes,
fortifications, etc. It was found
through combat experience that the German entrenching tool – a “spade” – was
much more effective in close quarters combat than a standard knife or
bayonet.
Game Tips: The Spade does slightly more damage than the
other hand-to-hand weapons – either a hit to the body or head will take out an
opponent.
SS Knife
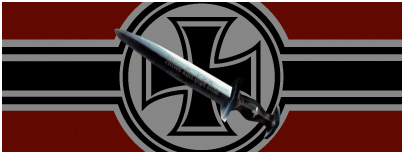
Damage: Moderate
A rare “showpeice”
knife that was sometimes used in combat if the situation was desperate enough.
Game Tips: A knife
will usually only kill in one hit if it is to the head – so aim high.
Gravity Knife
Damage: Moderate
Issued only to Fallschirmjaeger, this was more of a
utility knife rather than a combat knife – used primarily to cut tangled
parachute risers, etc.
Game Tips: A knife will usually only kill in one hit if it
is to the head – so aim high.
Stielhandgranate 24
Damage: Heavy
Basic German hand grenade – also called a ‘stick grenade’
or ‘potato masher’. Although the stick
allowed these grenades to be thrown farther than most others, it also added
extra weight to the grenade and made them very cumbersome to carry in large
numbers.
Game Tips: Enemy grenades can be caught and thrown
back. When you see an enemy grenade on
the ground (or in the air, if you’re really good!), hit the ‘use’ key to catch
it and the ‘fire’ key to throw it back. Be quick, though – grenades only have a 5 second fuse.
Clan
Play in 3.0
Some interesting features have been added to DoD in order
to aid and promote Clan and Squad matches. Some new server settings and
variables have been installed that will help in the structuring and timing of
clan matches.
In order to turn on the Clan system, use this command:
mp_clan_match 1
Once done, several other variables can be used to tweak
the clan round system:
mp_clan_timer # // This sets the number of seconds to start a
clan match. When the
mp_clan_restartround setting is envoked, it will rely on this timer. A message
will come up with the countdown so that everyone in the server has time to
prepare. At the end of this time, the
round will reset, the map will reset, and the player scores will reset.
mp_clan_restartround 1 // Will begin the clan timer
for the next round of play.
mp_clan_voice #(1 or 0) // A setting of 1 will
allow clan members to use the HL voice system anywhere on the map. A setting of 0 will use the standard DoD
voice system based on distance.
mp_clan_respawntime # // This is the classic DoD
respawn timer variable. Not available
anymore in standard multiplayer matches – this will allow clan’s to use the
‘old’ system if they wish.
mp_clan_showcutscenes #(1 or 0) // If mp_clan_match is on, then this setting will become
available. It will allow clans to turn
cutscenes on and off.
Setting
up a Server
Setting up a server to run DoD and allow people to play on
it is rather easy. First you need to
decide if you want to be able to play on it from the computer that is running
the server, or have it be a dedicated server. A dedicated server is much more
efficient in that it is run “out of game” – The server operator is not actually
in game with everybody else, playing.
For now we'll deal with a server you can run and play in.
(Non-dedicated) We'll use the basic server.cfg that comes with DoD for now, but
you will want to customize it to your liking.
In order to get a server set up and running you need to do
the following:
1. Open DoD, go to 'Multiplayer' then to 'Internet games.'
2. Select 'Create game.'
3. Now type in the name of the server, as you wanted it
listed, and the max number of players on that server. Keep this low around 8
max if you run
off Cable/DSL. Higher numbers
will work if your connection is faster. It is HIGHLY recommended that 56k users do NOT run servers.
4. Type in a password if you want one, be sure to give the
password to the people you want to play on your server.
5. Select a map from the list on the right.
6. Click advanced.
7. Now you need to set these settings. They are perfectly
fine by default but you might want to change a few things. The following is a
brief explanation
of each:
Frag Limit - Recommended that you leave this at 0,
anything else will end the round when the limit is reached.
Time limit - How long each round will last. 30-40
minutes is recommended.
Falling Damage - Leave this on realistic or it
people will be able to fall off very high things and not take any damage.
Footsteps - Allow other people to hear each other's
footsteps.
Flashlight - Allows people to use their flashlight.
8. Click 'Done'
and you’re set. Click 'OK' and the game will load. All you have to do now is
wait for people to join.
Server
Commands
The following is a list of server commands available in
Beta 2.1.
BASIC DoD Server
Settings
mp_tkpenalty – The number of ‘teamkills’ allowed before a player is kicked. “-1” to
turn off.
mp_teamlimit – The number of ‘extra’ players a team will be allowed. (Uneven teams)
Default of 0.
mp_allowspectators – Allow
spectator team. (1 = yes, 0 = no)
mp_deathmsg – Kill icons/messages in top right corner of screen. (1 = yes, 0 = no)
mp_chatmsg – Allow standard HL chat messsages. (1 = yes, 2 = no)
mp_dod_showcutscenes (default 1) – 1 will show
cutscenes on a server. 0 will never show cutscenes.
DoD Class limits
These settings will allow servers to limit the number of
players per class. It is not recommended to change these numbers, as each
individual map has its own unique limits, chosen by the mapper.
mp_limitallieslight
mp_limitalliessniper
mp_limitalliesassault
mp_limitalliesheavy
mp_limitalliesmg
mp_limitaxislight
mp_limitaxissniper
mp_limitaxisassault
mp_limitaxisheavy
mp_limitaxismg
DoD Clan Settings
See ‘Clan Play in 3.0’
for more information.
mp_clan_match
mp_clan_timer
mp_clan_voice
mp_clan_restartround
mp_clan_showcutscenes
Console
Commands
In-Game Commands
+attack // primary attack
+attack2 // secondary attack
+back // backpedal
+duck // crouch
+forward // forward movement
+jump // jump
+moveleft // strafe left
+moveright // strafe right
+reload // reload current weapon
+showscores // displays current player / team standings
+speed // sprint
+use
// use
changeclass // displays option to change your current class
changeteam // displays option to change your cureent team
dropmgammo // drops machine gun ammo
dropammo // drops your gun's ammo
force_centerview // forces your view to center
impulse 100 // flashlight
impulse 201 // spray logo
invlast // switches to last used weapon
invnext // displays next available weapon in your
inventory
invprev // displays previous available weapon in your
inventory
kill
// kill yourself in situations where you may be
stuck
prone // prone
slot1 // select weapon group 1
slot2 // select weapon group 2
slot3 // select weapon group 3
slot4 // select weapon group 4
slot5 // select weapon group 5
slot6 // select weapon group 6
slot7 // select weapon group 7
slot8 // select weapon group 8
slot9 // select weapon group 9
slot10 // select weapon group 10
special // secondary attack
stopbleed // bandage
Hand Signals
signal_enemyspotted
signal_spreadout
signal_holdposition
signal_takecover
signal_coveringfire
signal_areaclear
signal_flankright
signal_moveout
signal_flankleft
signal_grenade
signal_enemyleft
signal_enemyright
signal_backup
signal_sniper
signal_yes
signal_no
signal_fallback
signal_sticktogether
Voice Commands
voice_ceasefire
voice_usegrens
voice_moveupmg
voice_mgahead
voice_enemybehind
voice_enemyahead
voice_gogogo
voice_assault
voice_displace
voice_areaclear
voice_fireleft
voice_fireright
voice_fireinhole
voice_negative
voice_coverflanks
voice_sticktogether
voice_spreadout
voice_dropguns
voice_takecover
voice_backup
voice_needammo
voice_medic
voice_hold
voice_right
voice_left
voice_yessir
voice_grenade
voice_flank
voice_cover
voice_fallback
voice_attack
voice_sniper
Weapons
weapon_gerknife
weapon_amerknife
weapon_spade
weapon_kar
weapon_luger
weapon_garand
weapon_colt
weapon_m1carbine
weapon_thompson
weapon_mp40
weapon_mp44
weapon_bar
weapon_spring
weapon_gewehr //Scoped K98
weapon_mg42
weapon_mg34
weapon_30cal
weapon_stickgrenade
weapon_handgrenade
weapon_fg42
weapon_k43
weapon_paraknife
Sound
ambient_fade //
set the distance at which ambient sounds fade away
ambient_level // sets sound level for ambient sounds
bgmbuffer
// set the CD audio buffer size
bgmvolume //
enable CD audio (0 may improve performance)
cd
// control CD audio. 'cd stop' stops
play, 'cd loop X' plays track X (1-16 valid)
cl_appendmixed
User Settings
cl_allowdownload // enable download of maps, models, and
decals
cl_allowupload //
enable upload of maps, models, and decals on joining a server
cl_cmdrate
// set the number of times per second
that the client will update the server--higher settings may improve lag
cl_updaterate // set number of updates client will
request from the server each second--higher settings may improve lag
rate
// set rate that client will send data to
the server in bytes per second--6000-10000 cable/DSL ; 1000-4000 modem
cl_cutscenes //0 Never see them, 1 Always see them
Any Questions, comments, suggestions, additions, and
deletions should be pointed to our forums at www.dayofdefeatmod.com. Also, the Support Forums can be useful in finding extra information
not included in this manual, especially for server commands.
I would like to thank Curator for helping me write this
manual. He can be reached at curator@radioactive-software.com
I would also like to thank eXtreme for his help with the
console command list.
-DoD Team